When it comes to protecting your home while boosting curb appeal, few upgrades deliver as much value as vinyl siding installation. It’s durable, attractive, and available in a variety of colors and textures to match any style. But the real secret to making vinyl siding last, and look its best — is proper installation.
In this guide, we’ll walk you through everything you need to know about vinyl siding installation, from benefits and preparation to step-by-step installation methods, maintenance tips, and common mistakes to avoid. Whether you’re considering a DIY project or hiring professionals for siding installation, this blog will give you the knowledge to make informed decisions.
What Is Vinyl Siding?
Vinyl siding is a plastic exterior cladding made from polyvinyl chloride (PVC). Designed to mimic the look of painted wood, vinyl siding is highly resistant to moisture, rot, and pests. Since it doesn’t require painting or staining, it’s a low-maintenance alternative to traditional wood siding.
Modern vinyl siding is available in various profiles, including:
- Horizontal lap siding – classic overlapping boards for a traditional look.
- Vertical siding – perfect for modern designs or farmhouse styles.
- Shake and shingle siding – replicates the texture of cedar shakes without the upkeep.
- Board and batten – bold, vertical panels with decorative strips for a rustic appeal.
Why Choose Vinyl Siding Installation for Your Home?
- Durability
Vinyl siding can withstand harsh weather conditions, from blazing heat to freezing winters, without warping, cracking, or rotting.
- Low Maintenance
Unlike wood, vinyl doesn’t require repainting or sealing. A simple wash once or twice a year keeps it looking fresh.
- Energy Efficiency
Insulated vinyl siding adds a thermal barrier to your home, helping regulate temperature and potentially lowering energy bills.
- Affordability
Vinyl siding installation is typically less expensive than other siding materials, offering great value for its longevity.
- Curb Appeal
With hundreds of colors and textures available, you can match your siding to any architectural style or personal taste.
- Pest Resistance
Vinyl siding won’t attract termites or carpenter ants, making it a safer choice for long-term home protection.
Planning Your Vinyl Siding Installation
Before installation begins, careful planning ensures a smooth process and lasting results. Here’s what you should consider:
1. Choosing the Right Type of Vinyl Siding
Your choice depends on your home’s style, your budget, and the level of insulation you need. For example:
- Go for insulated siding if energy efficiency is a top priority.
- Choose textured shake siding for a classic, rustic look.
- Select smooth lap siding for a sleek, modern design.
2. Measuring Your Home
Accurate measurements prevent overbuying or underestimating the amount of siding needed. This includes:
- Measuring each wall’s width and height.
- Accounting for windows and doors.
- Adding extra for waste (typically 10%).
3. Preparing the Exterior
Before installing vinyl siding, the home’s exterior should be inspected and prepped:
- Repair any damaged sheathing or framing.
- Remove old siding or loose paint.
- Install a weather-resistant barrier for added moisture protection.
Step-by-Step Vinyl Siding Installation Process
While professionals bring experience and precision, understanding the process helps homeowners follow along and spot potential issues.
Step 1: Prepare the Surface
- Clean and repair any damaged areas of your home’s exterior.
- Apply house wrap or insulation board for extra protection against drafts and moisture.
- Install flashing around windows, doors, and rooflines to prevent leaks.
Step 2: Install Starter Strips
- The starter strip runs along the bottom edge of your home’s exterior walls.
- Use a level to ensure it’s perfectly straight — any unevenness will affect the entire siding installation.
- Nail the strip into place, leaving slight gaps for expansion.
Step 3: Attach Corner Posts
- Corner posts give the siding a clean, finished edge.
- Secure them vertically at each outside and inside corner.
- Leave a small gap at the top for expansion.
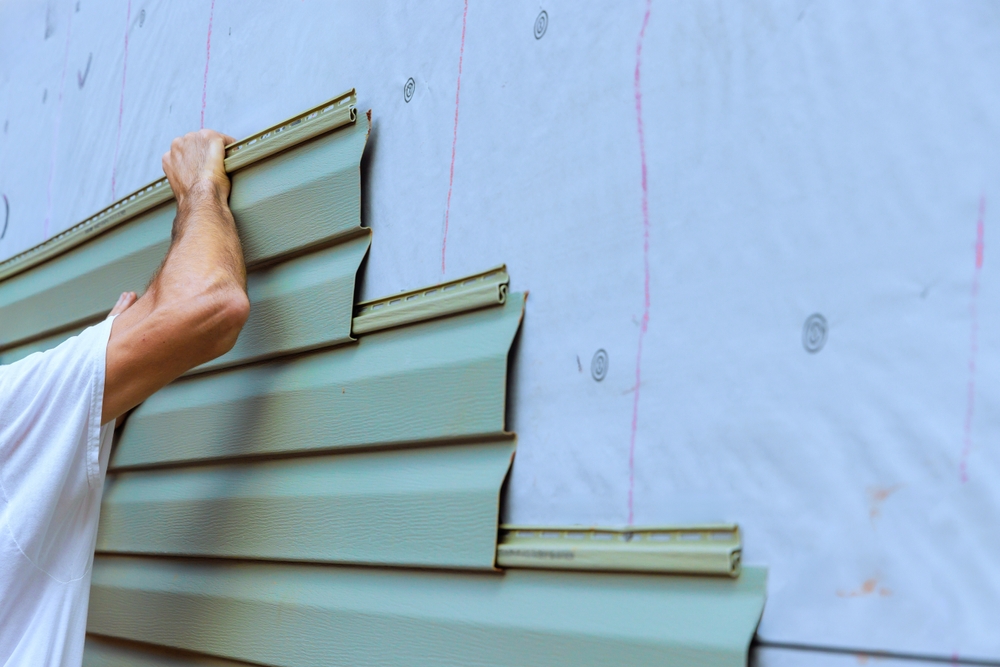
Step 4: Begin Installing the Panels
- Start from the bottom, locking each panel into the starter strip.
- Nail through the nailing hem, keeping nails centered in the slots and leaving about 1/32 inch of space for movement.
- Work your way across, overlapping panels slightly to allow for expansion.
Step 5: Install Trim Pieces
- Use J-channels around windows and doors to hold the siding edges in place.
- Add soffit and fascia for a polished look and additional protection.
Step 6: Finish the Top Row
- Cut the final row of siding panels to fit.
- Use a utility trim or finish trim to secure them at the top.
- Ensure all pieces are locked and secure without being overly tight.
Tools and Materials Needed for Vinyl Siding Installation
- Vinyl siding panels
- Starter strips
- Corner posts
- J-channels and trim pieces
- Nails or screws
- Hammer or nail gun
- Tape measure
- Level
- Chalk line
- Circular saw or tin snips
- Utility knife
- Safety gear (gloves, goggles)
Common Mistakes to Avoid in Vinyl Siding Installation
Even a high-quality product can fail if installed incorrectly. Avoid these mistakes:
- Over-nailing
Driving nails too tightly can prevent siding from expanding and contracting, causing warping.
- Uneven Starter Strips
If your starter strip isn’t perfectly level, every panel above will be crooked.
- Ignoring Weather Conditions
Installing siding in extremely cold or hot weather can affect expansion gaps.
- Skipping the Weather Barrier
Vinyl siding isn’t completely waterproof. A weather-resistant barrier protects your home from trapped moisture.
- Poor Panel Overlaps
Incorrect overlapping can create visible seams or allow water penetration.
How Long Does Vinyl Siding Installation Take?
The time frame depends on:
- The size of your home.
- The complexity of the design.
- The weather conditions.
- The number of workers.
On average, a professional crew can complete an average-sized home in 7–14 days, including prep work.
Maintaining Your Vinyl Siding After Installation
One of the biggest advantages of vinyl siding is low maintenance. Still, regular care extends its life:
- Wash Once or Twice a Year
Use a garden hose and mild detergent to remove dirt and mildew.
- Inspect Annually
Look for loose panels, cracks, or warping.
- Trim Landscaping
Keep trees, shrubs, and bushes from rubbing against the siding.
- Avoid Harsh Chemicals
Stick to mild cleaning solutions to prevent discoloration.
Signs Your Vinyl Siding May Need Repair or Replacement
Even though vinyl siding can last 20–40 years, certain signs indicate it’s time to take action:
- Visible cracks or holes.
- Warping or buckling.
- Faded color beyond restoration.
- Increased energy bills due to lost insulation efficiency.
Why Professional Vinyl Siding Installation Is Worth It
While DIY installation is possible for experienced homeowners, professional vinyl siding installation offers several advantages:
- Precision and Speed – Pros ensure everything is level, secure, and weather-tight.
- Manufacturer Warranty Protection – Many warranties require professional installation.
- Problem Detection – Installers can spot and fix underlying structural issues before siding goes up.
- Long-Term Performance – Proper installation maximizes lifespan and prevents costly future repairs.
Final Thoughts
Vinyl siding installation is one of the smartest investments you can make for your home’s appearance, durability, and value. With proper planning, the right materials, and skilled installation, you can enjoy decades of low-maintenance beauty and weather protection.
Whether you’re refreshing an older home or finishing a new build, vinyl siding offers a winning combination of style, strength, and affordability. And while some homeowners may take on the project themselves, hiring professionals ensures the best possible results — giving your home the perfect blend of curb appeal and long-term performance.
FAQs – Vinyl Siding Installation
1. How long does vinyl siding installation take?
The time for vinyl siding installation depends on your home’s size, layout, and weather conditions. On average, a professional crew can complete vinyl siding installation on a standard home in 7–14 days, including preparation and finishing work.
2. Is professional vinyl siding installation better than DIY?
While DIY vinyl siding installation is possible for skilled homeowners, hiring professionals ensures proper alignment, secure fastening, and long-term durability. Professional installation also helps maintain manufacturer warranties and reduces the risk of costly mistakes.
3. How much does vinyl siding installation cost?
The cost of vinyl siding installation varies based on your home’s size, the type of siding, and labor rates in your area. On average, homeowners invest between $6,000–$15,000 for a complete vinyl siding installation, with insulated siding and custom trim increasing the price.
4. What preparation is needed before vinyl siding installation?
Before vinyl siding installation, the exterior should be inspected and repaired for any damage. Old siding or peeling paint should be removed, a weather-resistant barrier installed, and measurements taken to ensure proper material coverage.
5. How long does vinyl siding last after installation?
When properly installed and maintained, vinyl siding can last 20–40 years. Choosing high-quality materials and professional vinyl siding installation helps ensure maximum lifespan, resistance to weather, and long-lasting curb appeal.